So you want to learn how to string a tennis racket but are terrified of messing up and ruining the frame? Been there, done that! I remember the first time I decided that restringing at home was a brilliant idea. However, I didn’t know what I was doing, and I ended up completely destroying one of the most expensive rackets I owned, wasting hundreds of dollars.
In my defense, stringing a tennis racket is a hard job, and there were not so many sources of information back then. Well, after years of experience and that awful incident, I am here to teach you how to string a tennis racket yourself the easy way.
This is a great skill to have, even as a beginner, as it will save you time and money while helping you connect better with your racket. Without further ado, let me show you how. Keep scrolling!
Tools and Material
- Clippers
- Awl
- Pliers
- Scissors
- Stringing machine
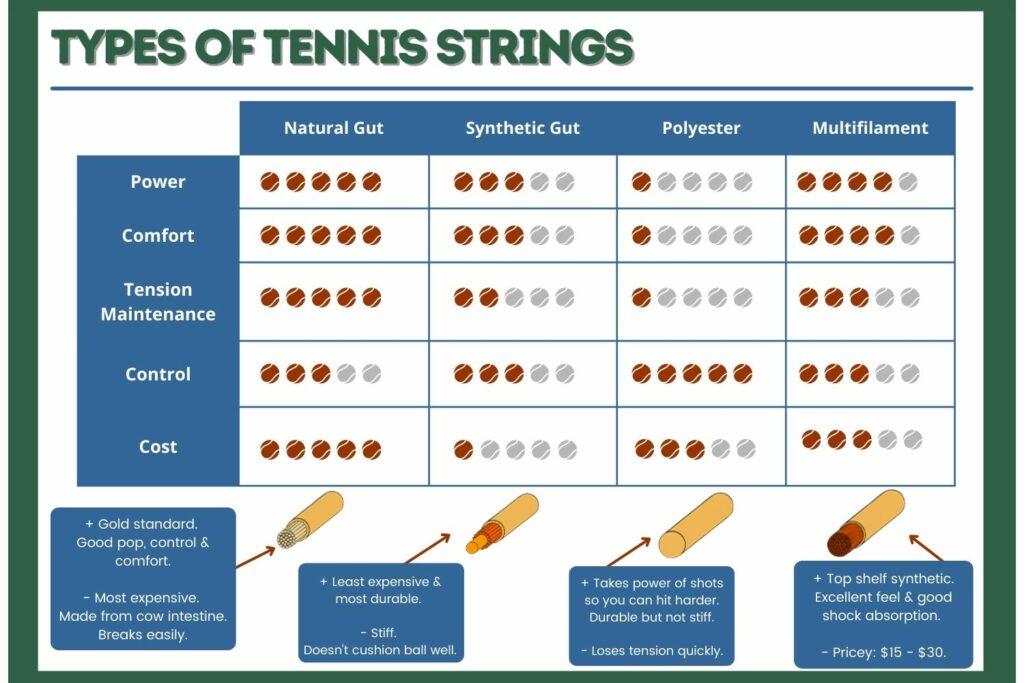
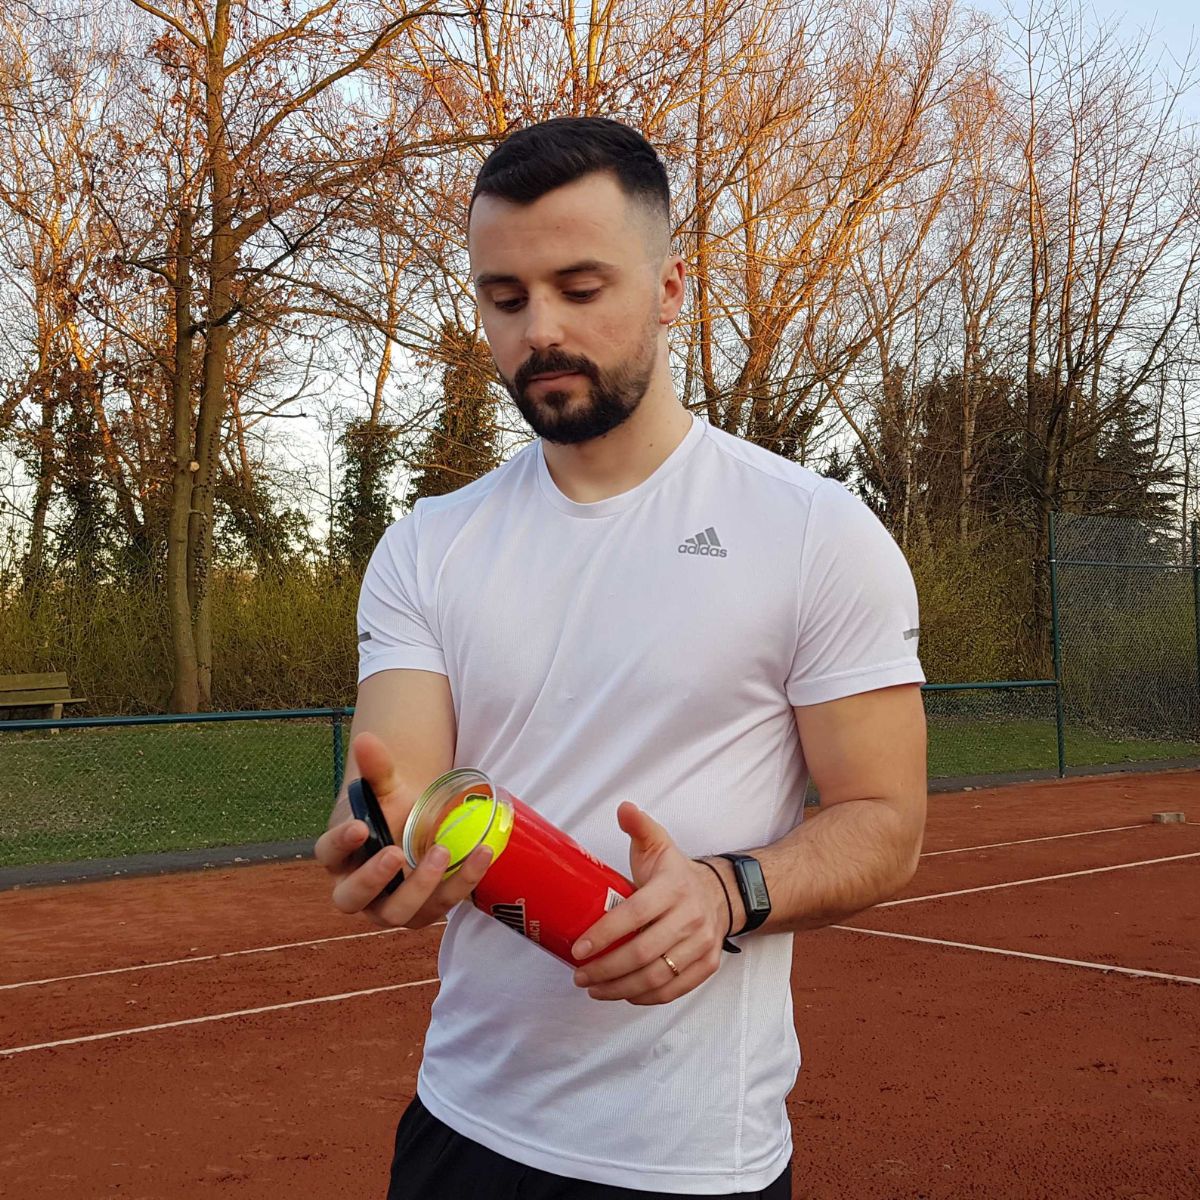
Step 1: Choose the right tennis string.
Before getting started with the stringing process of your racket, it’s important to be absolutely sure that you have made the right choice regarding strings. Take your time to decide on what type of string you think will be able to perform at your best.
Picking the gauge level and tension rate is the next step, which you should decide based on your skills and needs on the court. Usually, you have these types of instructions on the package, so make sure to look up the racket’s and strings’ specifications.
If you are absolutely clear on your decision, then everything else is just a matter of mechanical processes to achieve the perfect frame that will help you close matches with more ease.

Step 2: Cut the old string.
Now that you have decided what the right type of string for you is, it’s time to get to work! The next natural step is to cut the old strings so that you can replace them with new ones. They served you well, but it’s finally time to restring your frame, so the old ones have to go!
To do this, you’ll need a pair of string cutters. If you don’t have it, then a pair of utility scissors that you probably have at home will do the job just fine. Start by cutting the main strings in the middle section, but please make sure to be careful and not hurt yourself.
The end of the strings can be incredibly sharp, and you don’t want to cut yourself just for being reckless. It’s also important not to damage the grommets or the inside edges of the frame. If this is the first time restraining your racket, take all the time necessary to avoid any bad incident from occurring.
Step 3: Preparing the racket and tennis string.
Most local tennis clubs have at least one stringing machine for their clients to use for free. You can probably find one in the sports shop retailer where you live, which is up for rent in exchange for a small payment.
In case you are wondering how much it costs to string a tennis racket, it ranges from $25 to $50, at max. This is a great deal, but if you really want to invest in the game, you can always buy a stringing machine yourself, but that will cost you anywhere from $200 to hundreds of dollars.
To prepare the string, you should begin by measuring them first. The standard size of a pair of strings is 40 feet (12.2 m), which is more than enough. The measurements should always be done considering the frame’s size.
If you have a 95-inch square racket, then you’ll need around 38 feet (11.6 m) of strings. Needless to say, larger frames need more strings. It’s better to cut off in larger chocks and then get rid of the waste, or you might risk not having enough strings and starting the process all over again.
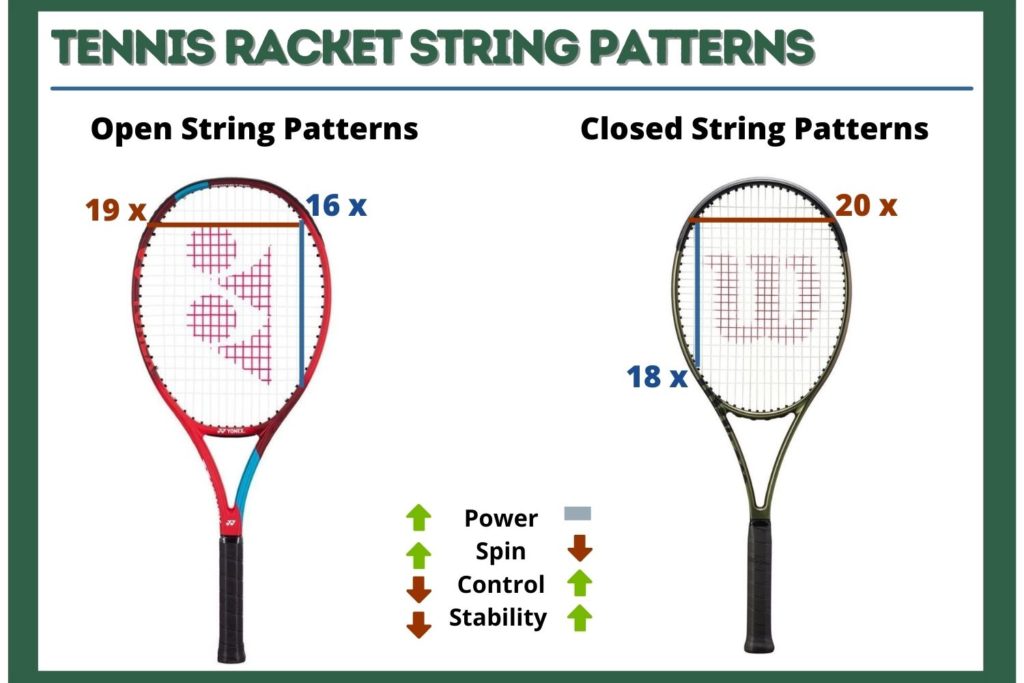
Step 4: Choose a stringing pattern.
Usually, the stringing pattern of a racket comes in the instructions included in the package. You can find it in the specification, or look up online if you can’t find it. The standard for most frames is an open 16×19 string pattern or a dense 18×20. Knowing this will also help you assume how long to cut off the strings beforehand.
Remember, the mains refer to the vertical strings, starting from the loop down to the bottom. The cross string is the horizontal string tied to each side of the frame’s edges in a 9 and 3 o’clock position.
Let’s say you want to restring a 16×19 string pattern frame. All you have to do is measure 16 lengths for the mains, and 19 for crosses, with some extra length for the knots, and you’ll be good to go!
Step 5: One or two-piece technique?
To restring a tennis racket, you’ll have to choose a one or two-piece technique. It sounds complicated, but I promise you it’s not. The one-piece technique simply means stringing the racket by using the same strings for the mains and crosses.
According to many players, this is the best way to ensure that the strings will hold tension better and last longer.
The two-piece technique refers to using two different sets of strings to set up a hybrid frame. To do this might take you a while, as the mains and crosses need to be measured one at a time. However, this technique is easier to do when you are still learning how to string a tennis racket.
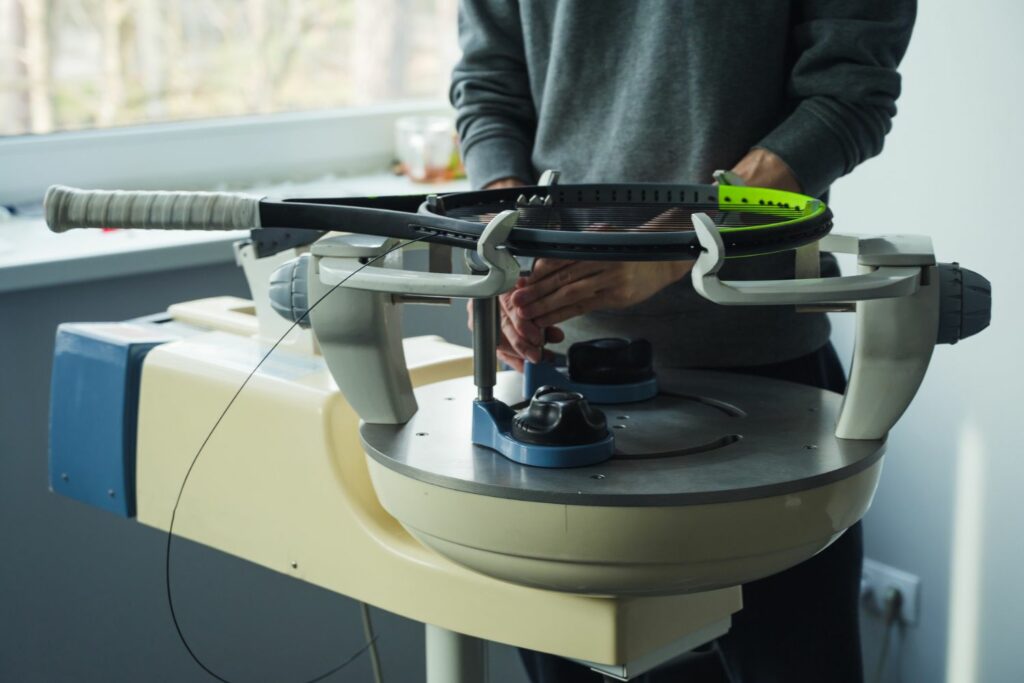
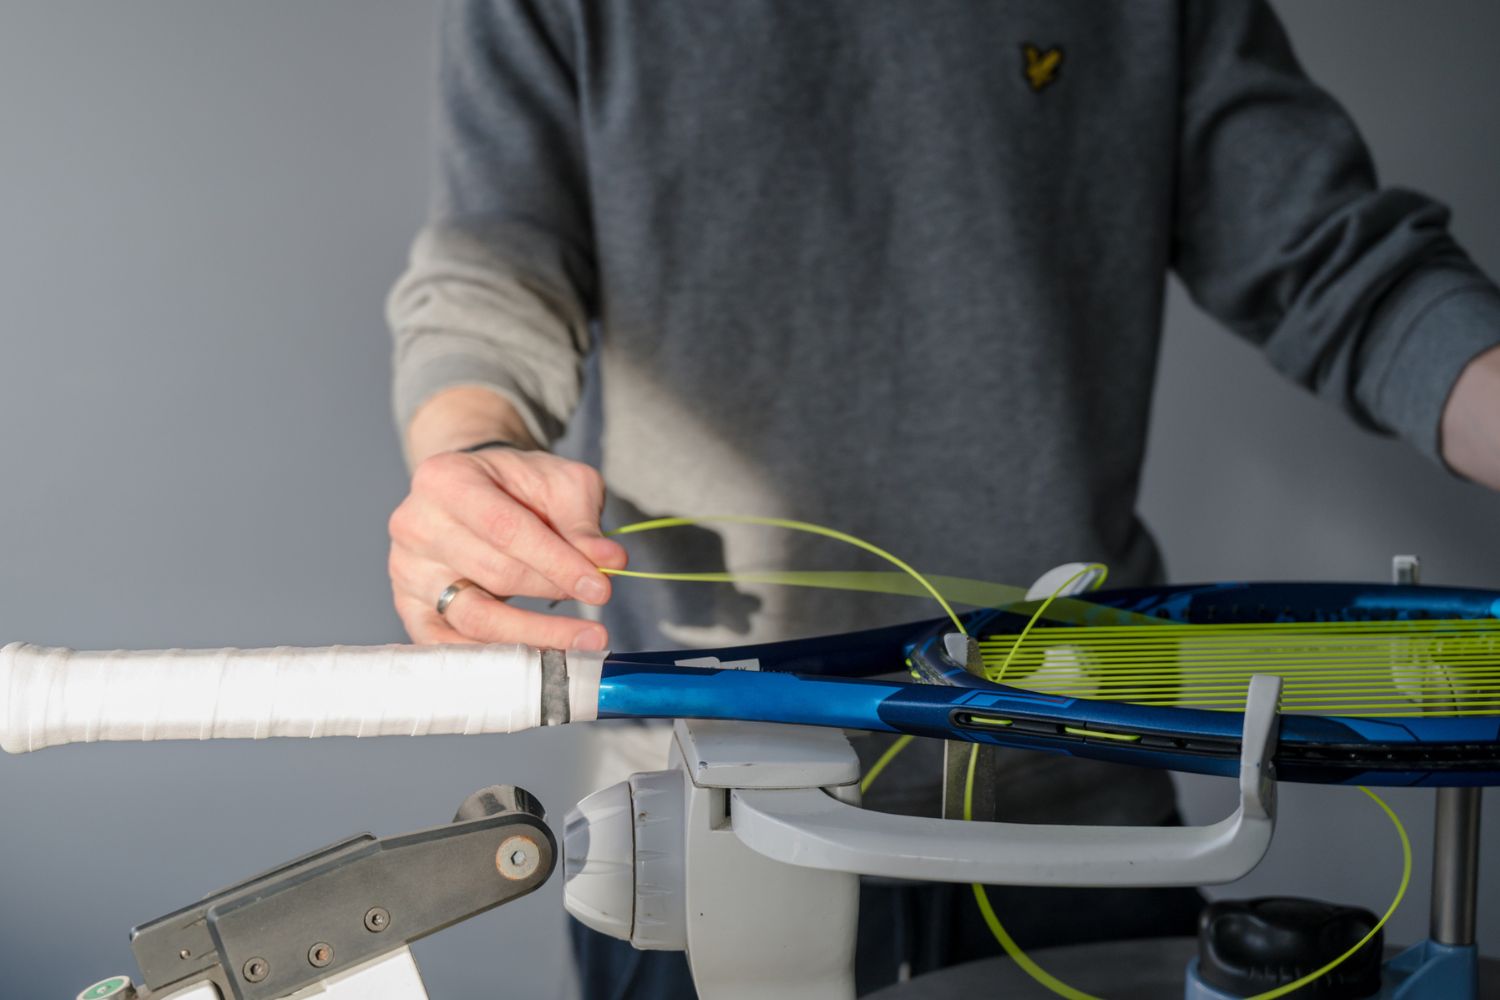
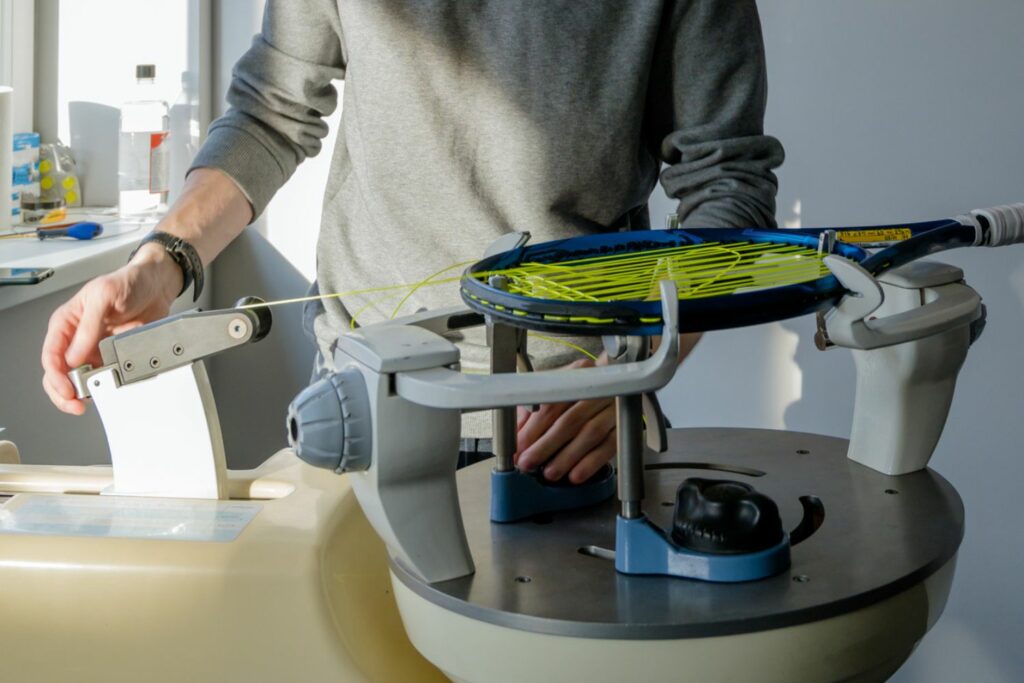
Step 6: Mount the racket on the stringing machine.
For this next step, you should lie down the racket on the stringing machine you’ll use for the process. The machine design will visually guide you on positioning the racket’s head and handle.
At the sides, you’ll usually find four screws or clippers that will hold the racket firmly in its place. Make sure to pull them tight and that the frame isn’t moving. Only then can you proceed with the rest of the stringing process. The clippers holding the racket shouldn’t, in any case, be let loose, or else you can damage the strings or lose some of the tension.
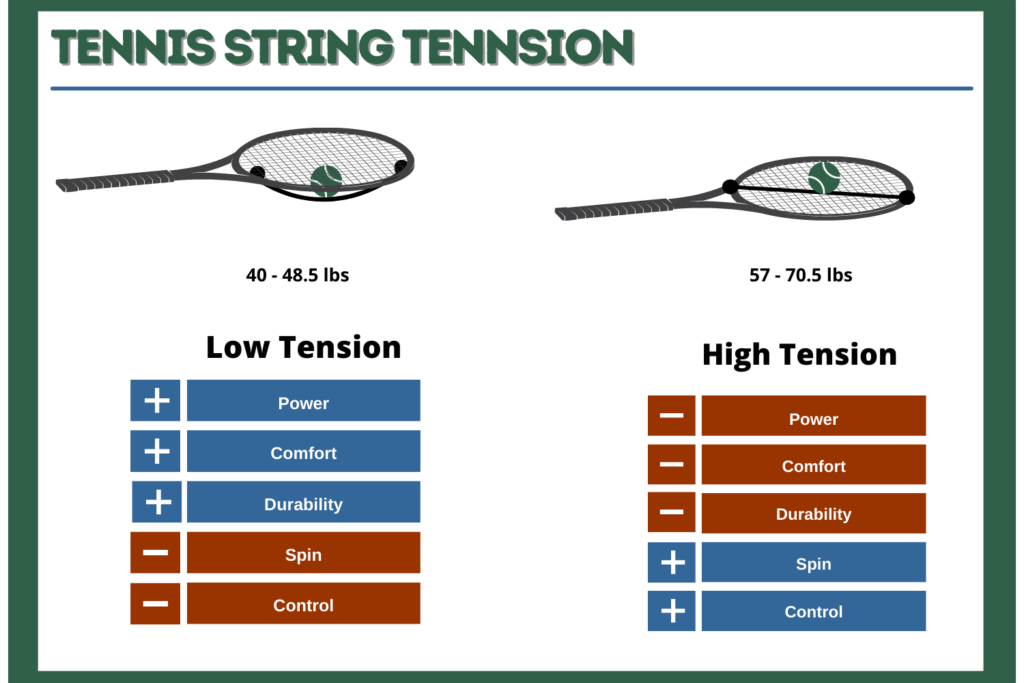
Step 7: Set the tension.
You should always consider the tennis string tension rate before restraining a tennis racket. As mentioned above, most of the manufacturers will put a recommended tension on the package, alongside other specifications. While it is wise to stay within that rage, you can always make adjustments according to your needs and goals on the court.
If you want to add more power to your frame, you should let the string loose, whereas you should go for higher tension rates if you aim for control and heavy spin. After making up your mind, you should put the desired tension rate on the stringing machine. Watch out for the beeping sound of the machine, which will let you know that the strings are pulled at the right tension.
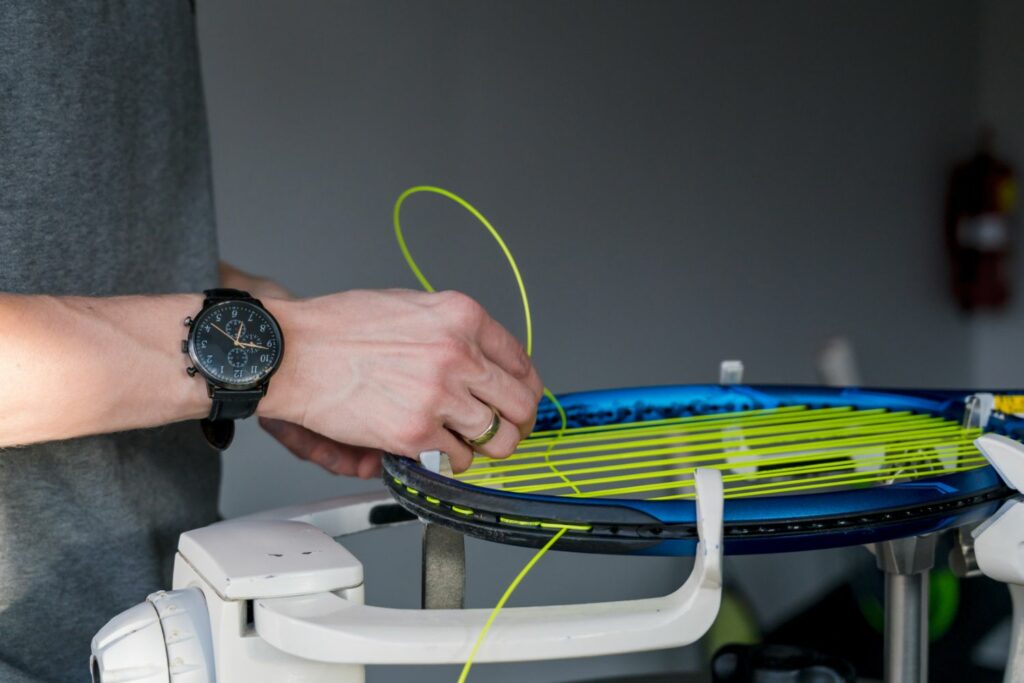
Step 8: Tension the mains.
When stringing a tennis racket, the mains are always first. For this next step, after you have measured the strings so that you’ll be certain that the length is enough, start with the middle grommets.
The strings should go where the two holes inside the frame’s structure are. The new thread should start from the head to the racket’s throat. Repeat the process until the racket has all of its horizontal strings set in place.
In case you are using the one-piece method, it would be smart if you use a marker of a sort to highlight where the end of the string is supposed to go, just to make sure that you are leaving enough for the crosses, too.
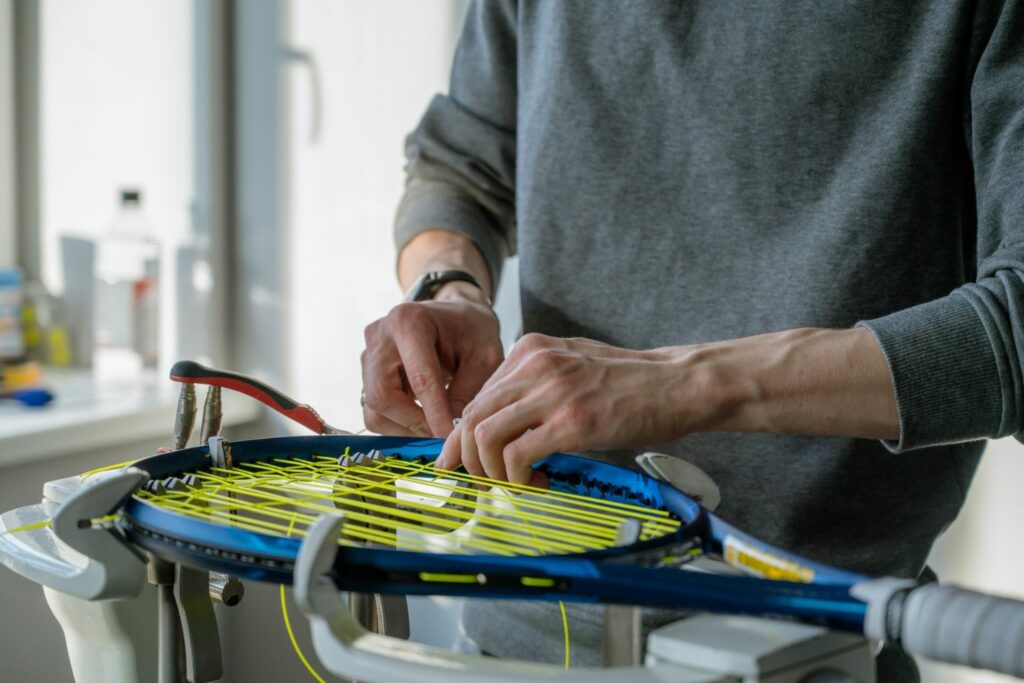
Step 9: Tie off the main knots.
After you finish threading the main strings, it is time to make sure they will retain shape for a long time. The only way to do this is by tying off the mains knots with high precision before starting with the crosses.
First, make sure that the machinery clippers are doing their job properly, so the frame won’t slip.
To make a knot is very easy; pull what’s left of the main strings and slide that down at the short end of the third. When the knot is created, pull it as tight as possible, and repeat this exact process one more time. If you can’t do it by hand, which totally understandable, you can always use the awl or a pair of pliers. When you are done, cut off the access strings and throw them away.
Step 10: Cross strings.
Now, it’s time to string the frame cross-sided. To do it there are two ways, depending on the method of your choice. For the one-piece method, simply use the string from the mains. All you have to do is to find the first cross-grommet on edge, which might look ill-placed to the untrained eye. Pull the string through the groomed, and start threading.
For the two-piece method, look for a shared hole that is big enough to pull the string again, and then simply start threading. Regardless of the method, the movements should always be from left to right.
Step 11: Knot the cross strings.
Now it’s time to knot the cross strings, as the last step of this process. To do this, you only have to find the most suitable place on the frame where you can form a descend knot. Repeat the same process as with the mains. Sometimes, you might need a pair of utiliser scissors to make the hole a bit wider so that the string can get through it without a problem.
After carefully pulling off the last knots, it’s time to release the tension rod and cut the strings’ access length.
Now you can safely remove the racket from the stringer machine. But before looking for the end result, it is better to examine the frame, just in case of an incident that has damaged the racket. Make sure to get rid of all the access strings and that you are in full control of the racket.
A Few Things to Know
In case you didn’t know, here are some tips on how to string a tennis racket.
- The manufacturer’s recommendations on the tension rackets are not final or mandatory. They often use a recommended rate, expressed in kg or pounds, but you can always pick the sweet spot yourself. The best way to find out is by trying different tension rates. .
- You should restring a tennis racket in a year, based on how many days in a week you hit the court. If you are playing tennis three times a week, then you have to string the frame three times a year. Easy to remember, right?
- String dampeners can save your frame or at least make it last longer. You can add them during the stringing process, so they’ll act like a protective barrier. Players who rely heavily on generating spin and speed can make good use of string dampeners.
- Some types of strings are more durable and resilient than others. The best way to find a good tennis string that will serve you best is by experimenting with them.
FAQs
Still have questions about how to string a tennis racket? Check out these answers to some of the more commonly asked questions.
Q: Can you string a racket by hand?
Yes, it is possible to string a tennis racket by hand. However, it can be quite difficult and time-consuming, so most people choose to use some sort of stringer machine or tool to make the process easier.
Q: Is it worth it to string your own tennis racket?
It depends on how much you play. If you only play casually a few times a year, then it’s probably not worth the hassle. But if you’re a serious player, then stringing your own racket can save you money in the long run and give you more control over your tennis racket.
Q: What happens if you don’t restring tennis racket?
The tension on the strings will slowly decrease and the racket will eventually become less effective at providing resistance and transferring energy to the ball. This will cause your shots to lose power and accuracy over time. It is important to string your tennis rackets regularly in order to keep them in good condition and get the most out of them on the court.
Q: How long does it take a professional to string a tennis racket?
For those who are looking to have their tennis racket professionally strung, the process usually takes around 30 minutes. It can take slightly more or less depending upon the type of string being strung and the desired tension.